Wednesday 25 November 2015

Hammock Texturing

The texturing for the hammock was pretty straightforward. Allot of the texturing I find very straightforward. Using Mudbox to paint really does speed up my workflow and I don't have to always update textures in Maya. I can just see it there in mudbox then export texture map when done. I don't always send the final textured mesh back to maya. It does something funny with the sahder in Maya so I just export texture.


Painting this I first focused on the base colour and then used the burn tool on the inner areas to create shadow. I also painted on some very tiny tapers. Next I painted on some brighter and darker scratches for some more detailing and to break it up a bit.

Simple worm on a hook!

To be honest I don't think I needed to texture the worm. If I was thinking I could've just assigned 2 differnt materials onto the mesh instead of painting over it. The topology aloud me to do so aswell.


Flower Texturing

Iris

Texturing is like my secondary strength. Have unwrapped allot of these assets myself I was able to easily start texturing in mudbox. I chose Mudbox for texturing because the UVs were not symmetrical and I was able to see what the textures looked like in 3D.

Texturing the flower was very tedious but straight forward for me. With the UVs layed out I used 3 colours referncing the iris flower.

Here are a couple of different flower petals I textured

 I had to paint ever Petal individually. If I combined the mesh then the Uvs would have overlayed.
I simply used a bright violet for the base and a darker violet for the detailing. The yellow was another part of the flower.


Here are some Stencils I created to mimick the iris flower pattern on the flower petals. I ended up not usiing them because the texture became too photoreal and I ended up using brush strokes instead.


Reference:

Monday 23 November 2015

Learning the human head.

So I spent the 1st quarter of the day sculpting a human eye. Having the eyeball in place I was able to use it as a guide to sculpt around. To make him look older I added in a bit of flesh above the eye. I feel I should have done a proper eye though. :/ Next time I sculpt an eye I should aim to do it properly.


Future Reference


Sculpting a Skull

The rest of my day was spent by sculpting a human head. I only got the base mesh down seeing I'm following a digital tutors technique. I think I'll be sculpting the skull a second time though seeing I want to know the proper face scaffold. Reason I'm sculpting a skull is because I want to know how the human head functions and have an imaginary guide in my head whenever sculpting a head.


Still have a bit of a way to go. Tomorrow I plan on spending my morning sculpting another piece of the face. (Probably an ear or mouth) and then the rest of the day refining the skull. Once finished the skull I want to give it a second go.


References


Sunday 22 November 2015

Zremesher

Zremesher is a script in zbrush that will automatically retopologice your entire mesh. I don't trust this script because sometimes its edge flow can be very funny. You can control the script to some degree like guiding the edge flow and show its poly density. The test mesh I'm using is a model I made in Maya

Dynamesh version 

Zremesh with no guides. The scripts processing time ranges from 15 seconds to 1 minute. Processing time depends on the poly budget you give it.


Here I have drawn on zremeshguides for the script to use as a guide for edge flow. The blue and red highlights are painted on the mesh. These highlights indicate poly density.

Red = X2 polys
Blue = X0.25 Polys
White = X1 Polys


Overall for this test the edge flow didn't come out bad but there are some areas I see were it can be allot better. I feel it would be more safer to do retopo work more manually. But depending on what is required I guess I'd only use it 10% of the time.

Dynamesh!

Dynamesh!

I figured out a good workflow for creating organic 3D assets. When creating organic shapes assets (specially non-symmetrical ones) I've always struggled with the process of maininting good form with topology. I knew that the only way to have a good form was only by having good topology but now using the dynamesh function in zbrush frees me from having to always think about topology to nail good form. In zbrush I am able to first focus on the organic shapes form (silhouette) and then do retopo.

The dynamesh function makes the whole mesh uniform in poly density enabling me to sculpt in specific areas.

 Before Dynamesh
After Dynamesh
Notice how there are more polys for me to work with on the tail and its density is uniform with the rest of the mesh.

Its topology will be projected in an x and y axis from all sides of the mesh.

Edge flow aims to go for a straight X and Y

Projected from all sides.

Wednesday 18 November 2015

Monster Texturing

Its the 1st time I've ever been given the responsibility of texturing. I'm not so good for texturing in photoshop so I used mudbox instead. Using my bump map for a mask I was able to easily make the holes on his back a colour to the skin.

I mixed around a broad range of colours for this. Drak green and pruple were used very subtly. Red and dark red browns were used for blood areas and sores and the primary was a skin colour. I burned and dodged areas of the skin to make sure the base skin colour wasn't so based and made sure there were some darker and brighter areas of the skin.


I worked allot on the back and didn't put much effort into the face. It was only till last night I found out the back was going to have 4 seconds of screen time. There is also going to be quite a bit of screen time for the face and I don't know if there is enough detail on there. I may be adding too much detail if I continue.

Monster Vlog

Vlog about my monster


Monday 16 November 2015

Monster Sculpting!

So here I've sculpted a creature who was once human but got infected by the cave and became a horrible plant humanoid. Exciting part about this task was that I got to use a broad range of software to achieve the desired look.


I first used zbrush to achieve the monsters basic form using the dynamesh fincution to my advantage and not worrying about the topology. While doing the sculpting in zbrush I was making sure the sculpt was not so intricate.

1st pass Detailing


Retopo

Here I used a script to do most of the reopology work. But for meshes like these its best not to use the script cause even though it may maintain quads


here you can draw paths that'll guide the edge flow but its still not a hundred percent reliable. sometimes an edge loop would wrap around the neck 2 or 3 times or the edge loop would go in very random directions. I would've been safer to retopo manually instead of using the zremesher script. But seeing as there is only going to be a cluster for the neck to rotate its safe to say it should be fine. Though this script may save allot of time I don't plan on using it much. This kind of script still needs allot of work.

Here is a single edge loop selected around the neck. It wraps around the meshes neck 3 times like a coil :( There are other areas were the edge flow is completely of but its good enough for clusters.
UV shells were fine and so was the texel density.


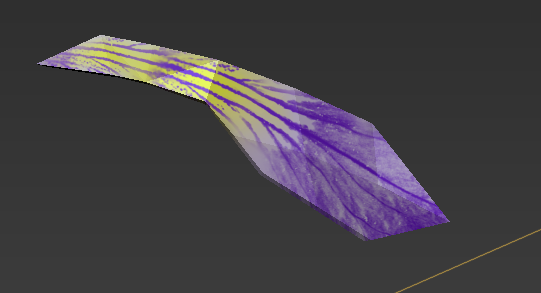
2nd pass detailing(Bump map texturing)

For more detailing I decided to paint on a bump map. Reason being was to make sure that the animators weren't working with an extremely high poly mesh. This was also to save render time and make sure it was easy to import and navigate. Seeing as the back was going to be shown more I detailed the back area more than the front area. Not much of the front was going to be rendered.


Thursday 12 November 2015

Reducing poly count of high poly assets.

I didn't retopo allot of the assets but instead I remeshed them to a lower poly. This saved allot of time because there were allot of assets to go through. The matte painters won't be texturing this. They simply want to use this as lighting reference and render it in grey scale. Reason I had to reduce the poly count was to make the pipeline easier. Making sure that the animators are able to navigate through the vieport easily.

allot of these assets were converted from 100k or higher down to 10k or lower.


Tutorial

The video is unlisted.
https://www.youtube.com/watch?v=9nRMQhpXLaI

Tuesday 10 November 2015

Final mesh fixes.

So there was an issue when doing cleanup on the mesh. For some reason Maya was spotting faces with 0 map area in the UV editor and we couldn't figure out why. When we turned on face centers display we couldn't find any faces intersecting within edges.

A guess as to why is that some of the faces in the UV editor so I decided to blow up the scale having to use up Multiple UV tiles just to get out of the issue. We could've left it on the 1 tile and continued with a risk but its safer to work with multiple UV tiles.

Here Maya is complaining about faces with 0 map area and we don't even know why.


Solution was to scale the UVs across multiple tiles and make sure the texel density was all uniform. Even though we don't know why I have had maya stop complaining about it. My guess is that the problem was that some faces in the UV tile were simply too small and needed scaling.


Low Poly vs High Poly

From observation the mesh looks allot better as a low poly version. When modelling low poly I was seeing how I could work with the soft shaded faces. I noticed that my topology was effecting the strength of the shadows on my mesh.

 Low Poly

SubD

In the SubD version the taper is allot thinner then the low poly version. With the low poly I'm able to work with the soft edges and bring out desired shadows and good form. In SubD if I was to increase the strength of the taper then it can get quite problematic were the low poly vertices would cross over each other. I believe this is part of the reason why the topology was so bad in the last one.

Base shape to detailed shape.

Nearly done.

To do list:
-Finalize hands
-Add shoelace to boots
-probably tweak boots
-Attatch shirt to pants
-Unwrap character
-Mimic previous head shape

Here is the base shape of my new mesh. Topology is similar to the previous version.


While detailing I made sure there weren't too many poles or too many edges going into a single poly, I also made sure the edge flow good for animation and rigging. I decided to use similar techniques to get the cloth tapering effect but bring it more boldly. For reference I sometimes observed my own shirt and trousers and see how they would taper. Some areas of tapering took around 20 minutes so I had to look up some references online just cause I couldn't sit still for that long.


 Here I'm making sure the hand shares the same pose as the previous attempt. Topology was really bad for the hand. When subdivided the edge loop went across the whole body but I don't believe this will be and issue for rigging.

2 selected edge loops pulled out.